


Introducing VMLogin Antidetect Browser
VMLogin is a virtual browser environment that enables users to manage multiple online accounts with isolated digital footprints. Each browser profile operates within its own independent environment, featuring separate local storage, cookies, IP address, and even customizable browser fingerprints — all managed under a single application.
Unlike conventional browsers, VMLogin ensures that each account appears to originate from a distinct device and location. This advanced anti-detection capability prevents websites and platforms from linking your accounts back to a single source.
Advantages of VMLogin:
1. Complete Profile Isolation: Each browser profile operates independently to prevent cross-account tracking and linkage.
2. Efficient Multi-Account Management: Easily create, manage, and scale hundreds of accounts within one platform.
3. Seamless Team Collaboration: Share profiles, assign permissions, and organize profiles into folders for smooth teamwork.
4. Robust Automation Support: Full API integration enables automated workflows using tools like Selenium and Puppeteer.
5. Advanced Fingerprint Protection: Realistic device fingerprint emulation combined with smart anti-tracking measures.
6. Flexible Proxy and Cookie Handling: Assign, rotate, and manage proxies and cookies per profile or in bulk with ease.
Why Use Proxies with VMLogin?
To maximize account security and simulate real user environments, VMLogin integrates seamlessly with proxies. Proxies provide unique IP addresses for each profile, helping prevent bans, avoid geo-restrictions, and verify ads across different regions.
In this guide, we’ll show you step by step how to set up the ProxyLuxe in VMLogin to ensure safe, efficient, and scalable multi-account operations.
Step 1 – Get Your Proxy Credentials
1. Register at Proxy.luxe.
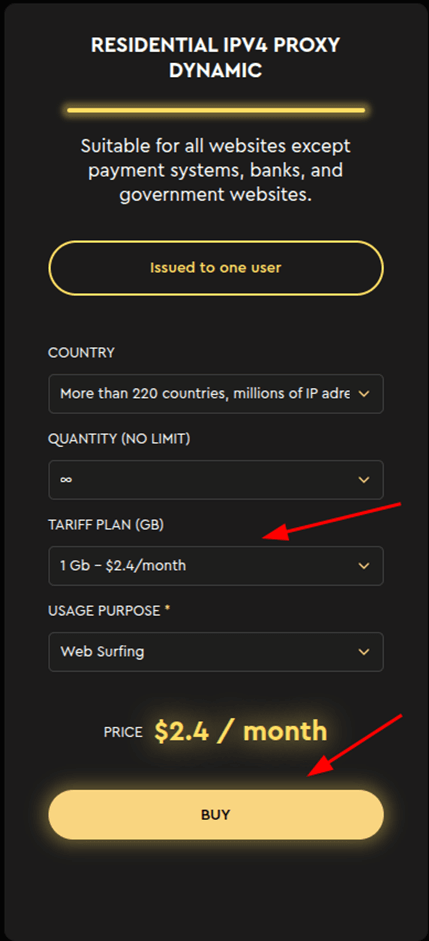
2. After registering, top up your balance using your preferred method and go to dashboard. Next, select a plan and click the "Buy" button.
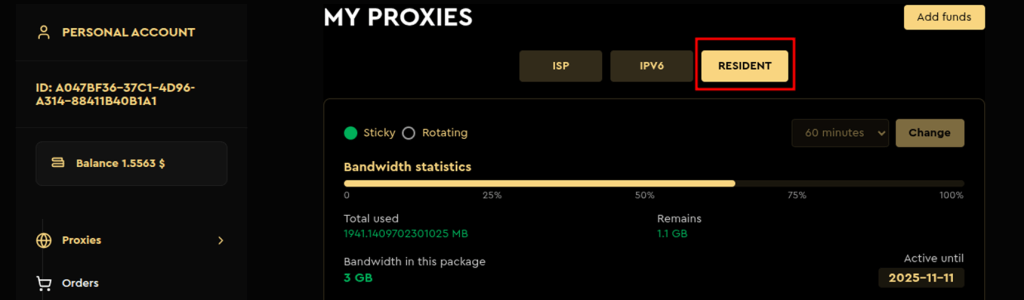
3. Next, go to your personal account and select the RESIDENT tab.
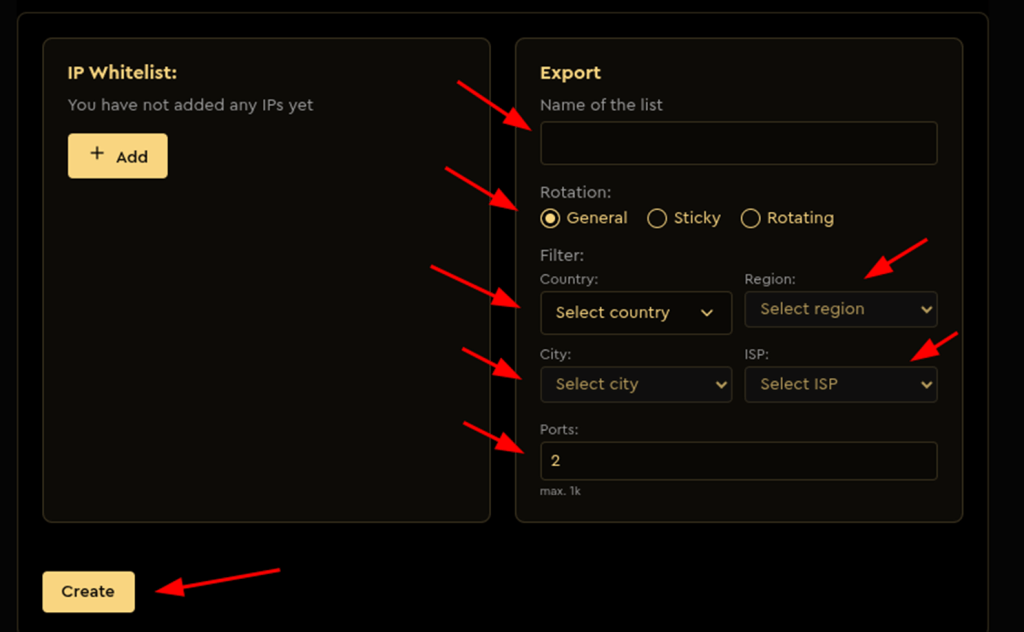
4. Fill in all the fields. Select a rotation. General—changes the IP address for each request. Permanent or rotating. Enter a list name, select the country, region, city, and provider.
Number of ports—the number of proxies to be created. Click the Create button.
5. If the proxy was not created, please specify another provider.
After this, you can download the list in the format you need by clicking the export button.
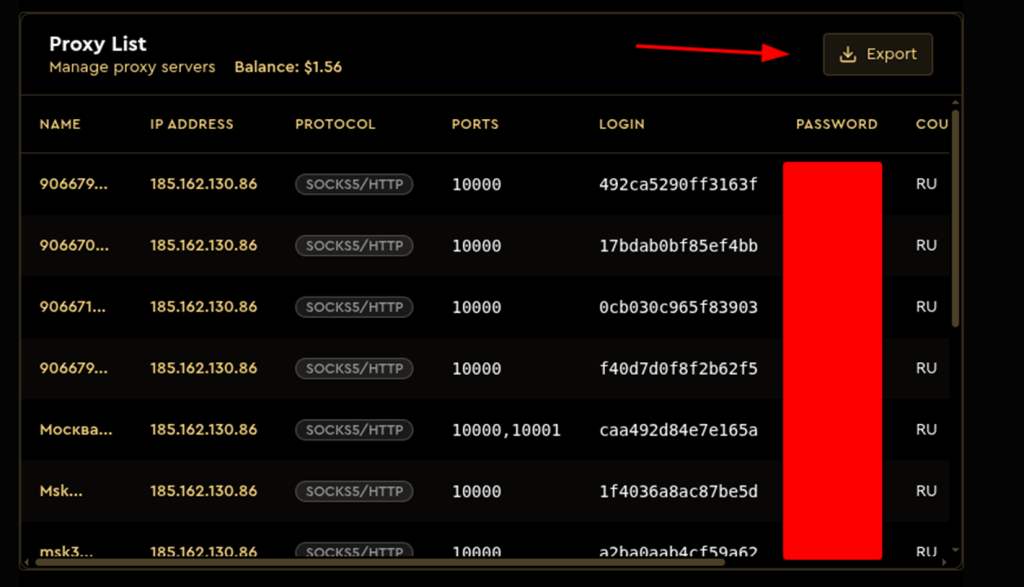
Step 2 – Add Proxy to VMLogin
Download and install VMLogin (Support a 3-day Free Trial).
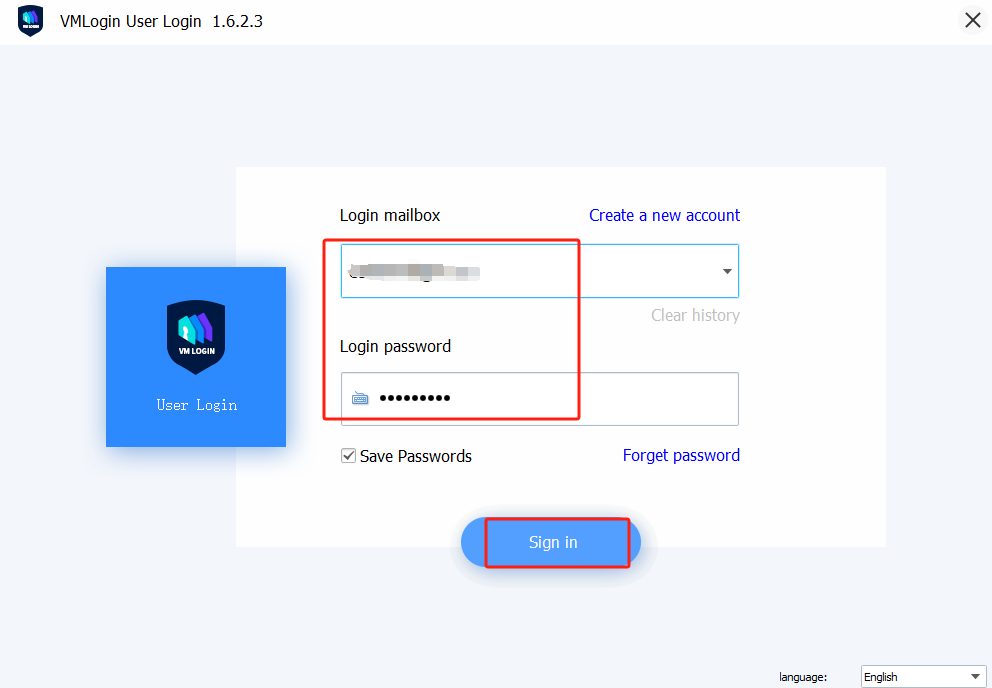
Launch the VMLogin client and log in to your account.
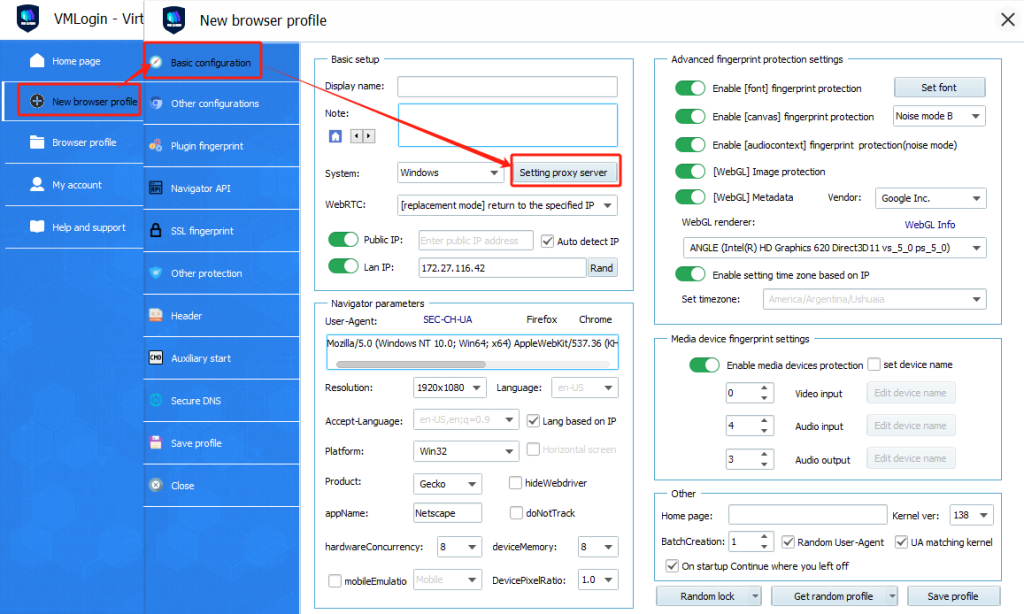
Create a New Browser Profile and Set the Proxy IP.
4. Paste Proxy in VMLogin and Test
First, toggle Enable the proxy server to ON.
Then, click "Paste proxy info" – VMLogin will automatically fill in the IP, port, username, and password.
Click Test Proxy to verify the connection.
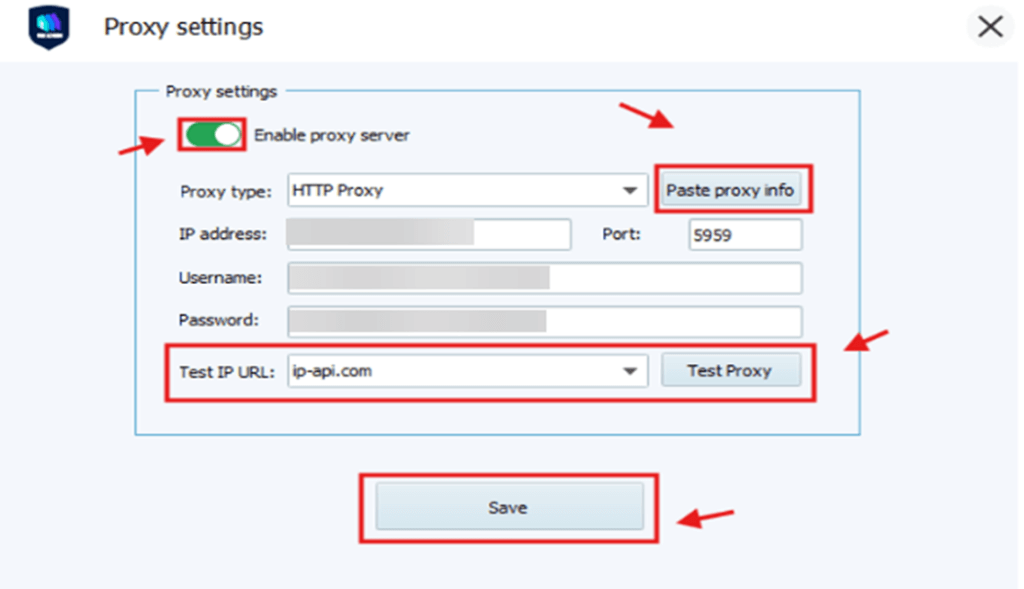
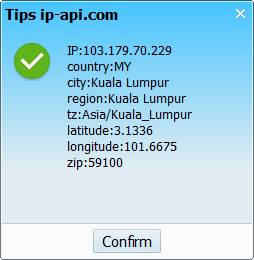
5. If the proxy is set up correctly, you’ll see a success message with the new IP and location. Click "Confirm" and then "Save" to store the settings.
6. Save the Profile.
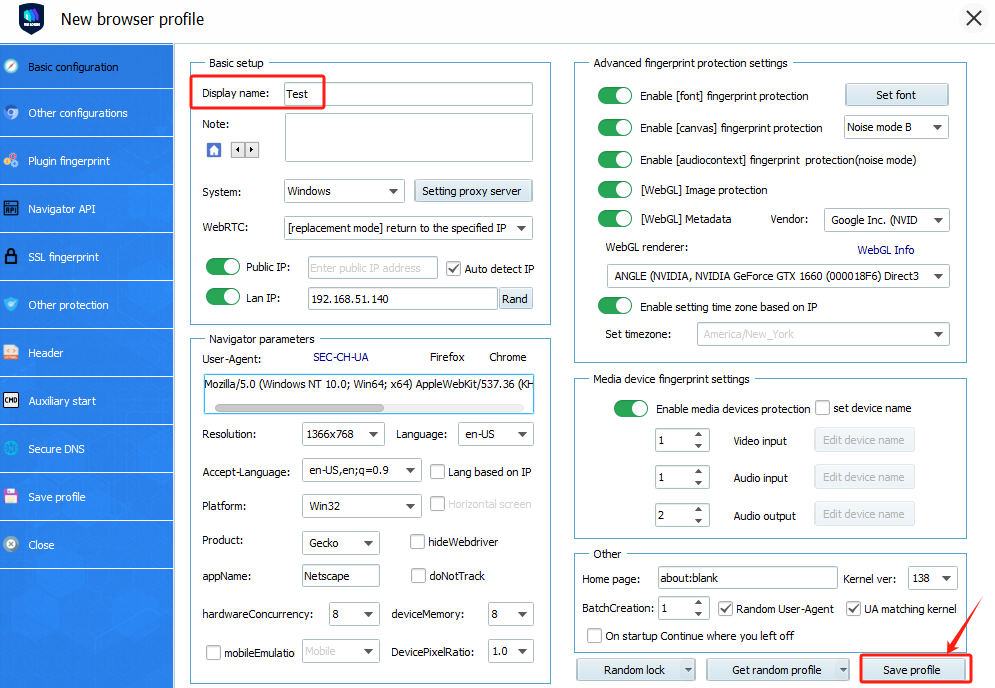
Your new profile with proxy integration is now ready.
7. Launch the Profile.
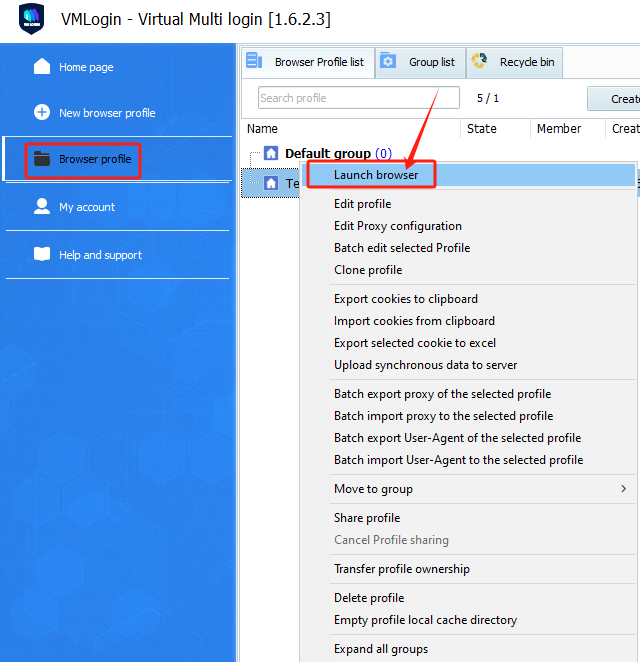
This will launch a new browser instance using the custom fingerprint and proxy you’ve set.